In this article I’m going to teach you how to set up Google Analytics 4 and then configure it for Google Ads, and that’s quite important.
There are a lot of benefits to having GA4, and one of the most important ones it’s basically Google Analytics is about to be obsolete after next year. So you want to make sure you have enough data up until this point to start the migration as soon as possible.
The Steps
Step 1: Log into your Analytics account and click the blue “Let’s Go” button on the banner at the top of your screen
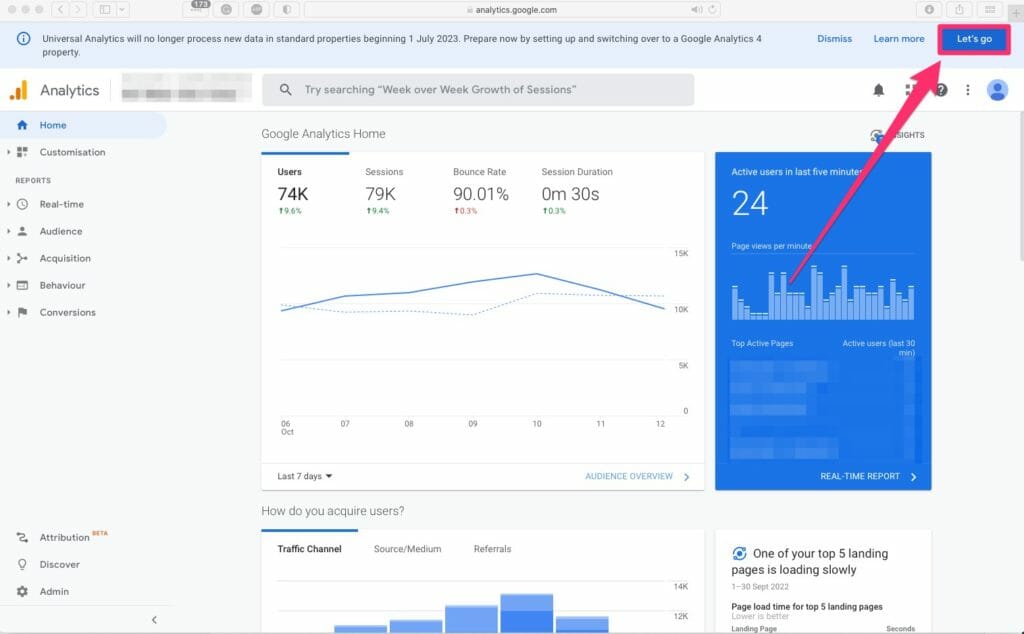
If the “Let’s Go” banner is not present, click on the admin gear in the lower left-hand corner and press on GA4 setup assistant.
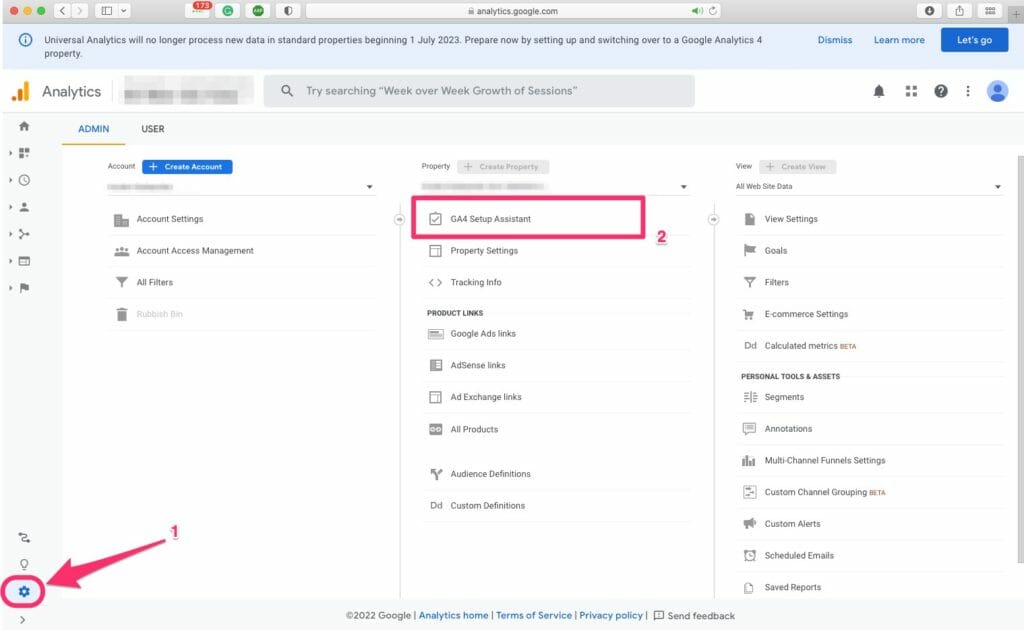
Step 2: Now click the “Get Started” blue button in the center of your screen
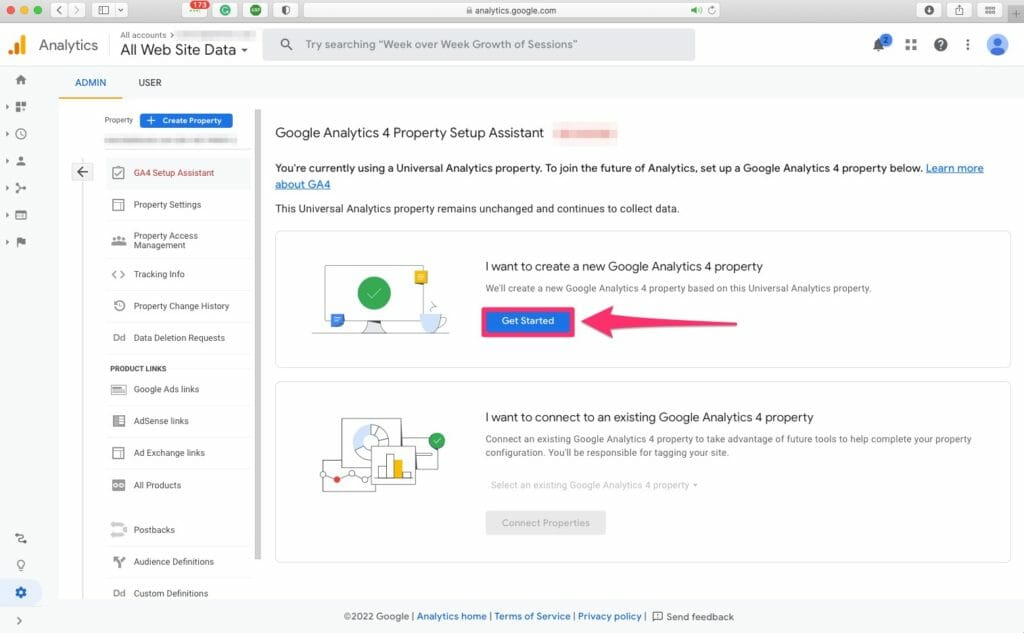
In the popup, confirm creating the property by clicking on the “create property” button.

Please take note of if you’re not able to check the data collection box, your screen will refresh and you will be in your GA4 account. And you’re done. That’s basically one of the biggest steps already. But now we also want to make sure that we are implementing that into our website and I prefer the way using Google Tech Manager.
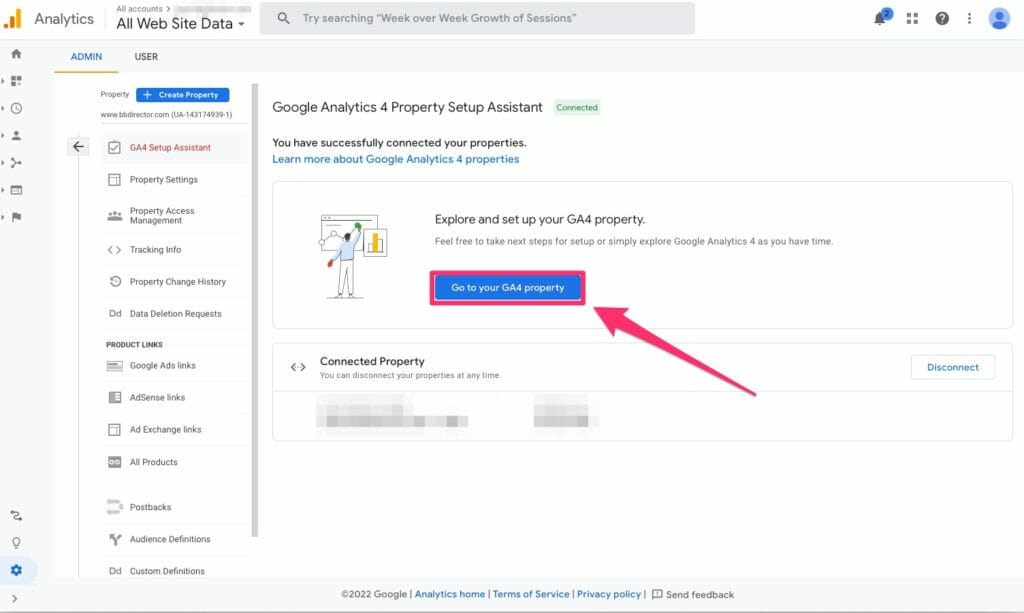
So I will show you in a second on how you can set it up. As you can see, this is the property that was just created by simply clicking on the button.
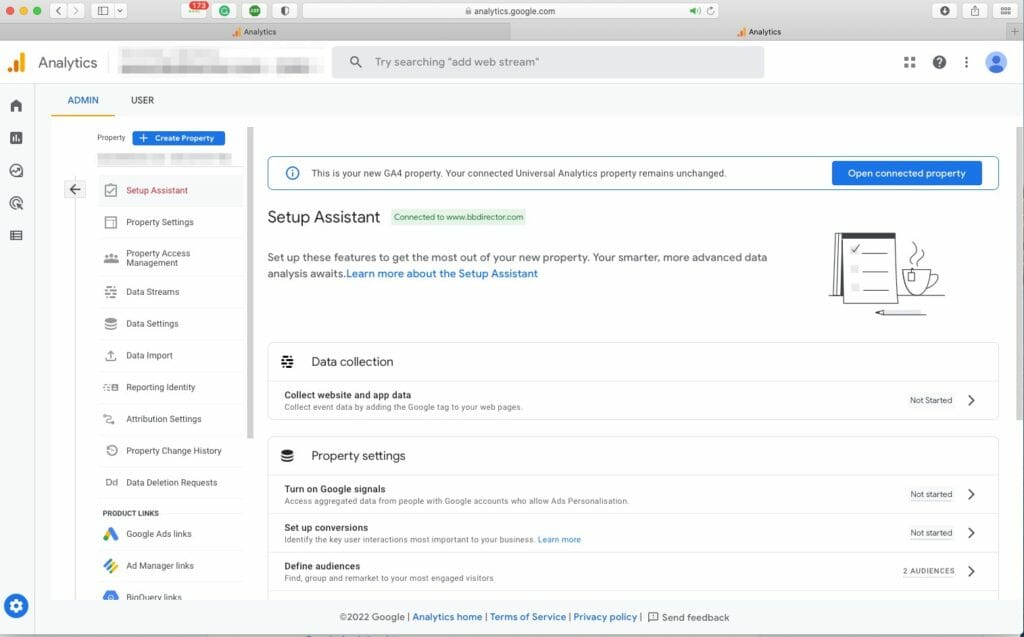
So when you just open it will show as a new property.
Just in case, I have an SOP, which you might need. and you can download it here:
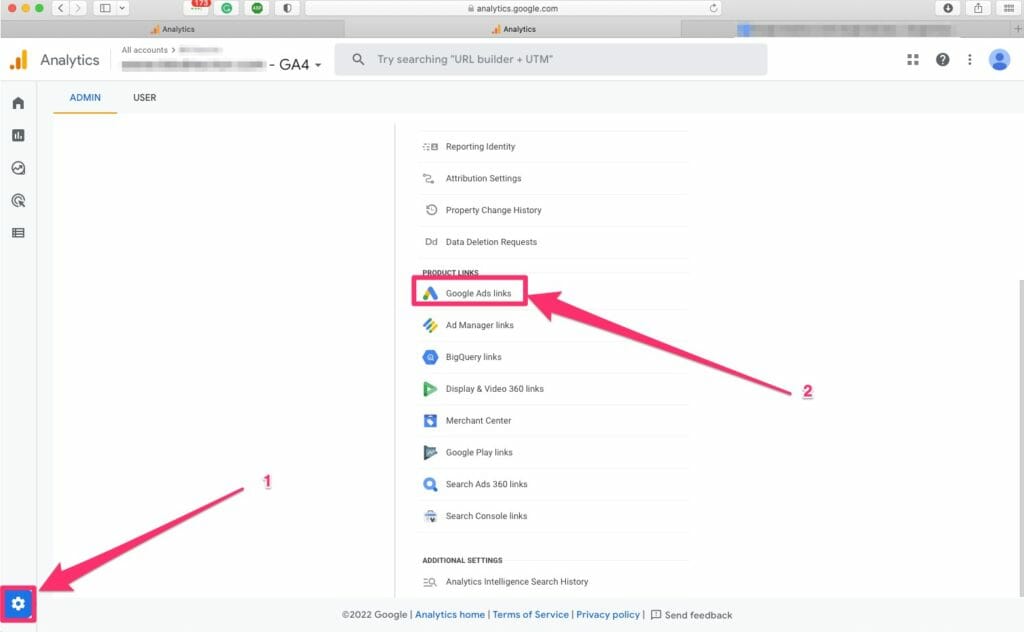
Step 4: Click the admin gear in the lower left-hand corner and under “Product Links” click “Google Ads links”
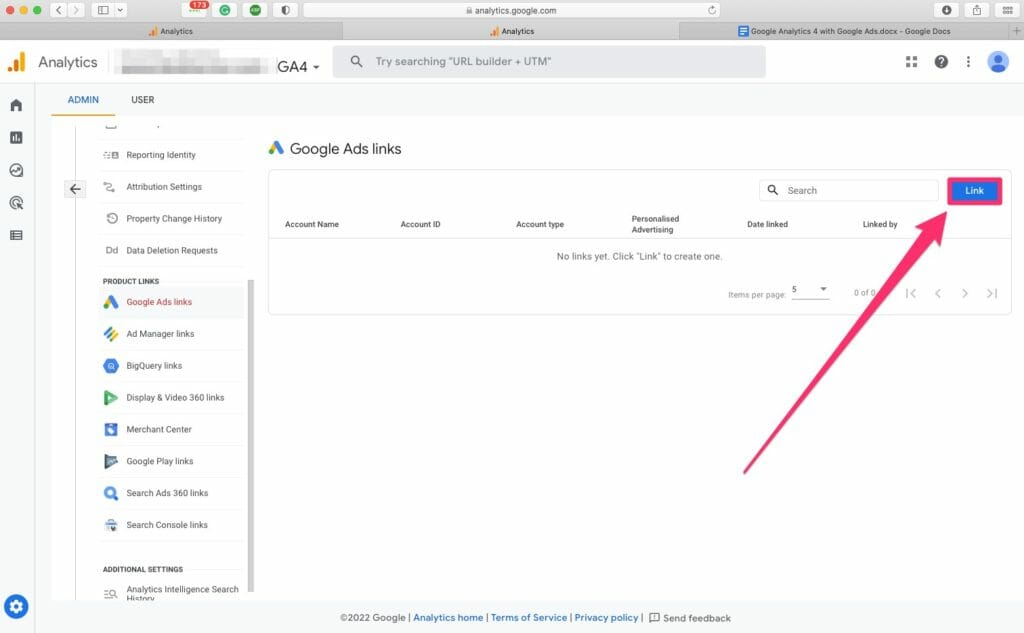
Step 5: Click the “Link” blue button
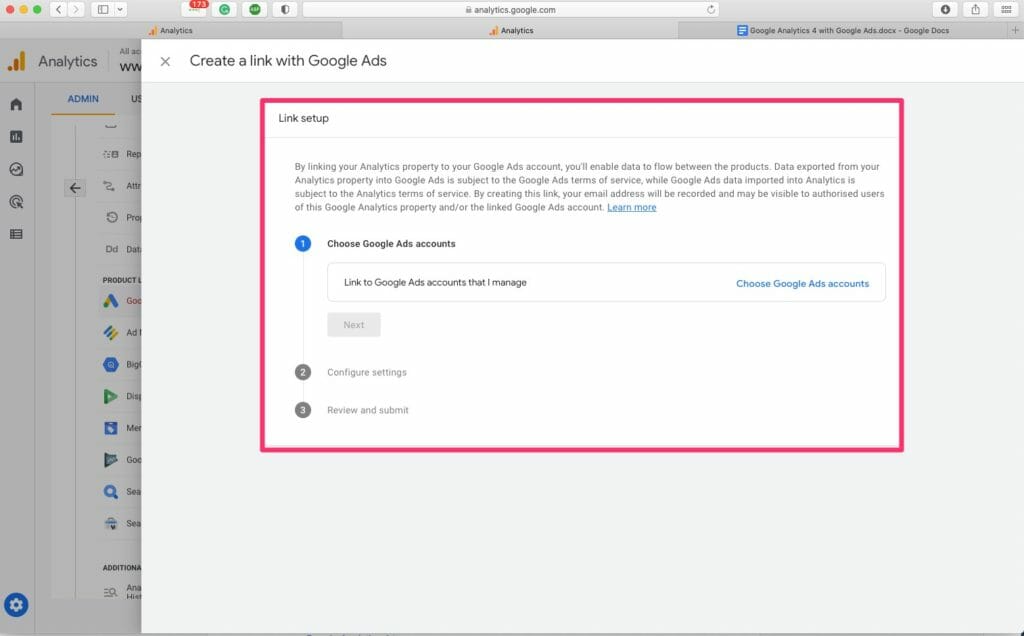
- Step 7: Follow the props and then you’ll click the blue “Submit” button
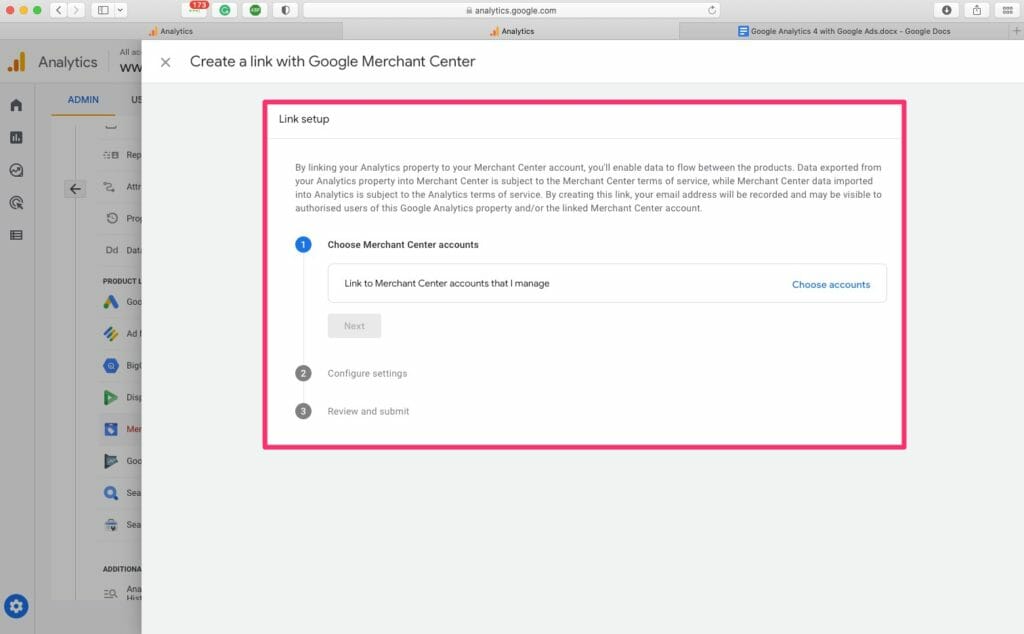
If you run Merchant Center, you want to do the same steps as well for Merchant Center. You can get that data inside. So here is Merchant Center. You can click on Link.
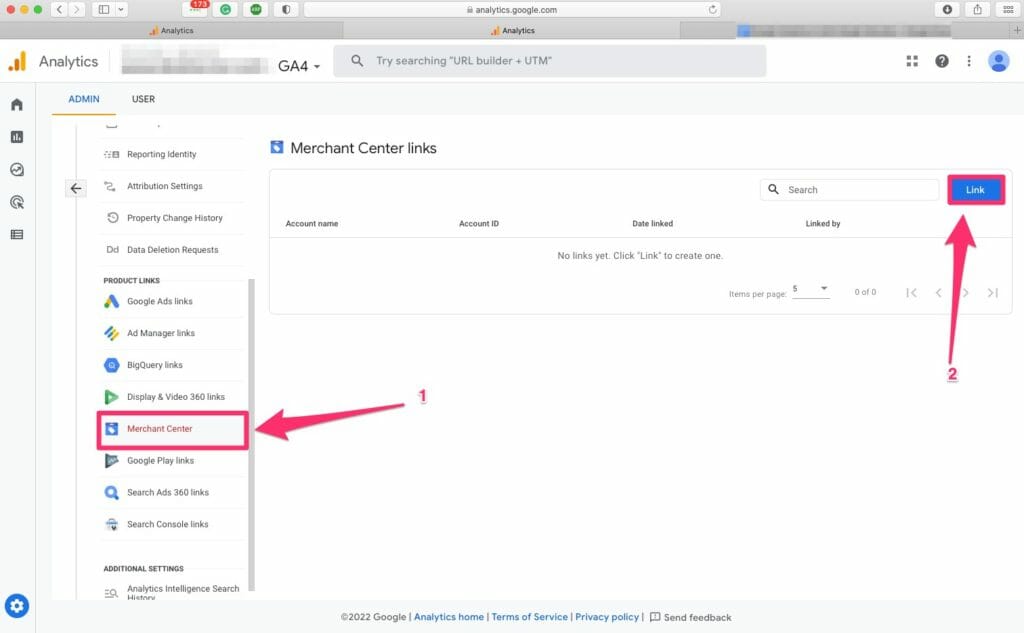
The main important part is that you have admin access to both accounts, to the Google Analytics 4, as well as the respective properties that you like to link.
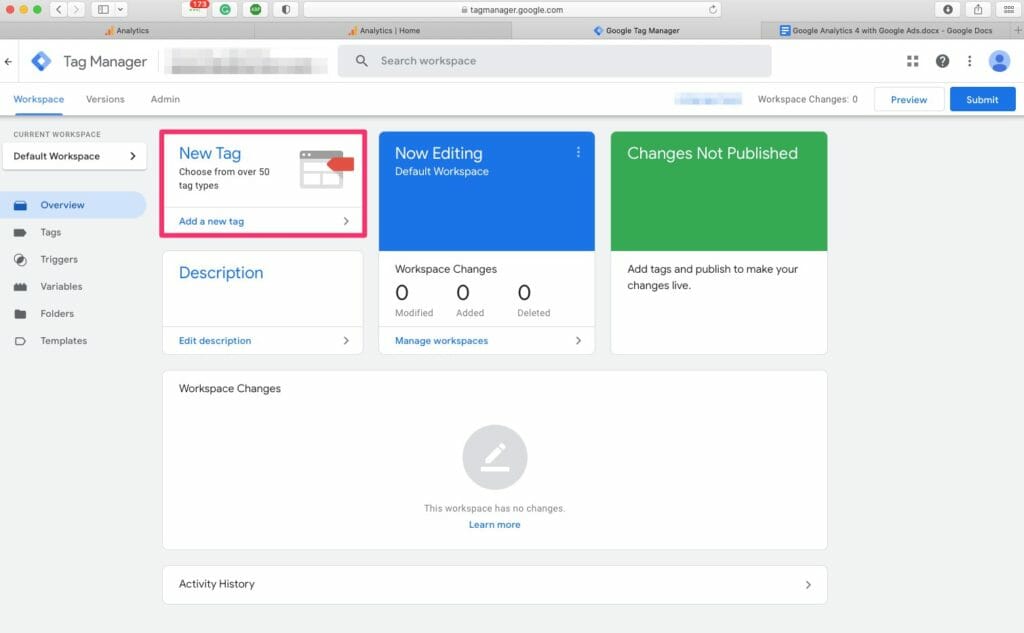
Okay, now we want to make sure that the Google Analytics 4 is also properly setup on your website. I prefer the tool Tag Manager, which I highly recommend because you can setup everything in there. You just have one code that you put on your website backend. And here you want to click on “New Tag”.
Let’s first give it a name. Make sure you have a good naming strategy “GA4 Tag”.
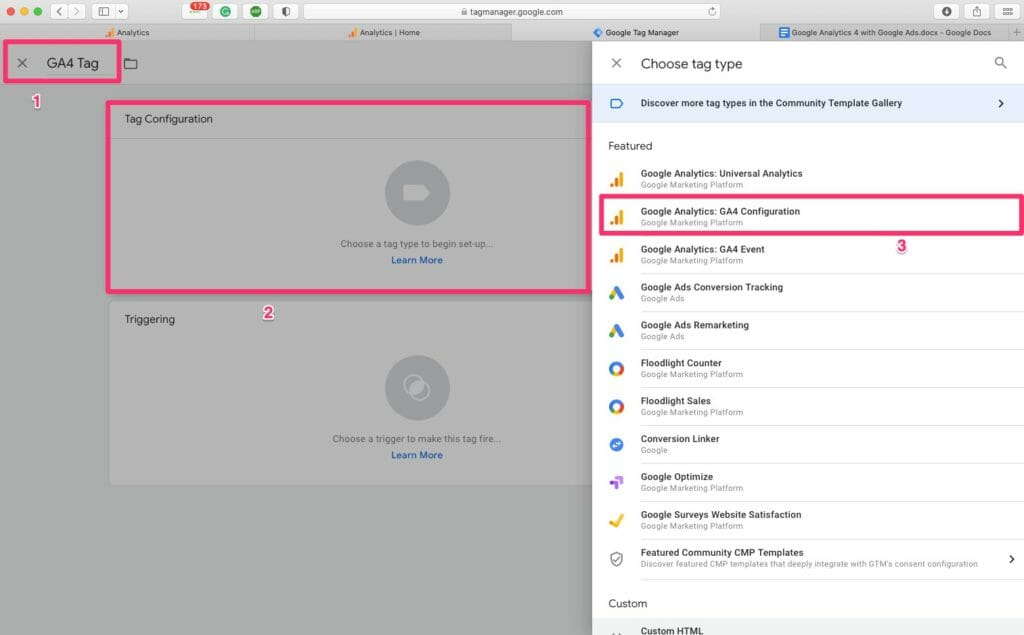
Then, Click on “Tag Configuration”, select “Google Analytics GA4 configuration”.
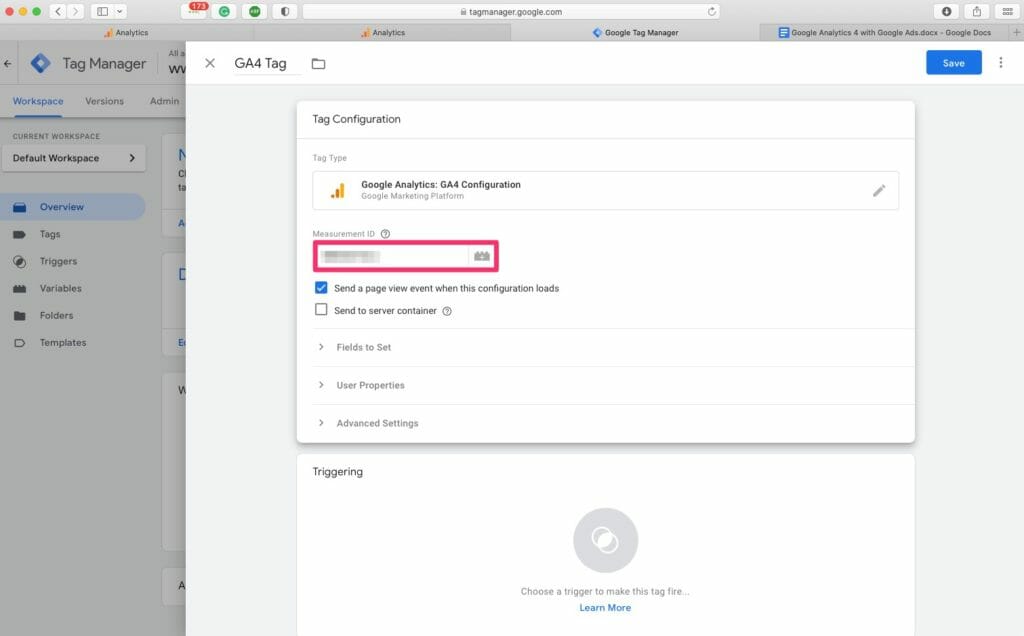
The measurement ID, you can check what it is, but it’s usually when you go back to the property you should be able to just take that ID.
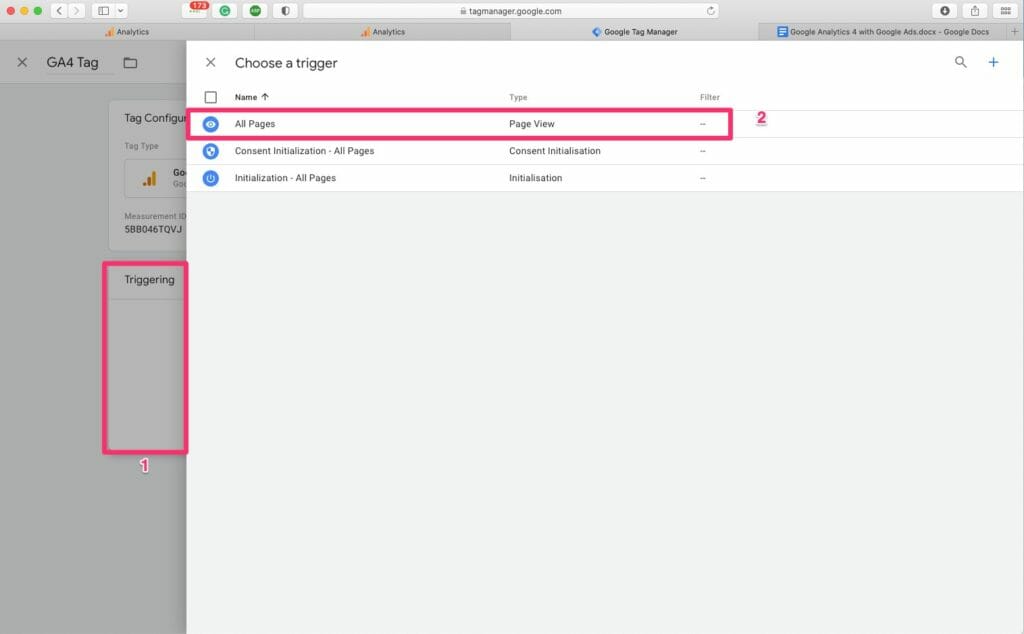
And here we got our measurement ID and we can set that up here, and then click on “All Pages”. Then click on “Save”, and then Submit, and Publish
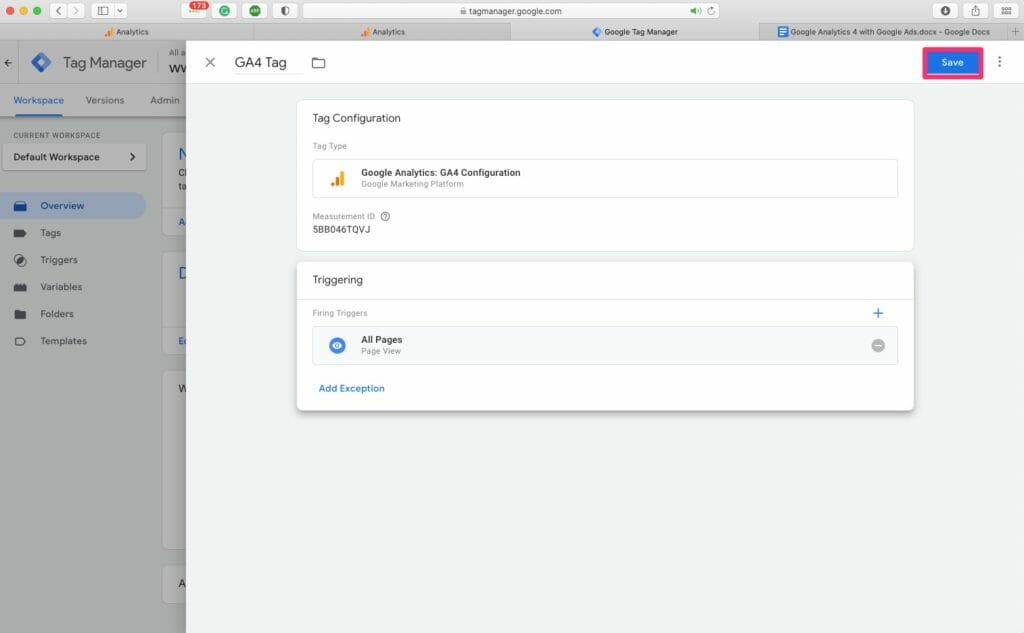
And this is how you can upgrade to Google Analytics 4 and also link it with Google Ads.


